VoiceThread
Below are the steps to create a Course View VoiceThread assignment in your live Canvas section.
NOTE: A VoiceThread assignment page has been added to the template with the VoiceThread Instructions for students. You may edit the VoiceThread assignment, give it a new Assignment Name and start at Step 6 below.
Steps to create a VoiceThread Assignment
On the Modules page, click on the plus (+) sign to add an assignment page. If you have already created an assignment page, select edit and move down to step six (6).
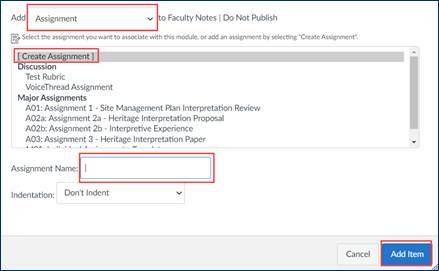
- Select Add Assignment.
- Click on Create Assignment.
- Add Assignment Name.
- Click Add item.
- The Assignment will be placed at the bottom of the current Module.
- Click on the Assignment link to launch the Assignment Page.
- Click on Edit.
- Copy the Student VoiceThread Instructions below and paste into the Assignment area.
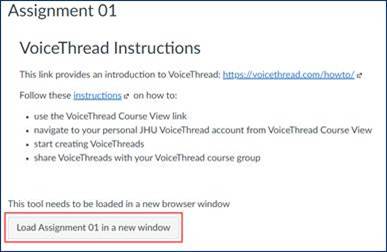
VoiceThread Instructions
This link provides an introduction to VoiceThread: https://voicethread.com/howto/
Follow these instructions on how to:
- use the VoiceThread Course View link
- navigate to your personal JHU VoiceThread account from VoiceThread Course View
- start creating VoiceThreads
- share VoiceThreads with your VoiceThread course group
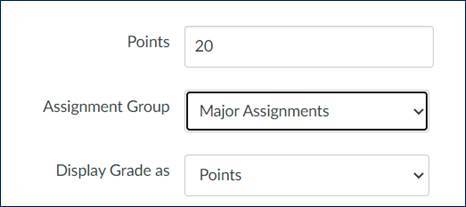
- Update Points, Assignment Group and ensure Display Grade as is Points.
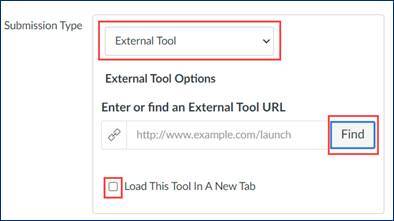
- Move down to Submission Type and change the selection to External Tool.
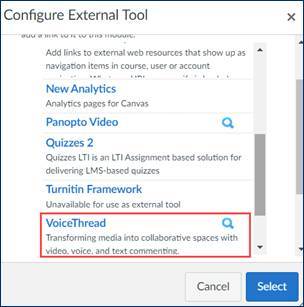
- A Configure External Tool window will open. Move down and click on VoiceThread.
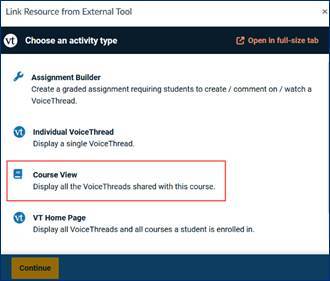
- The VoiceThread window will open. Select Course View.
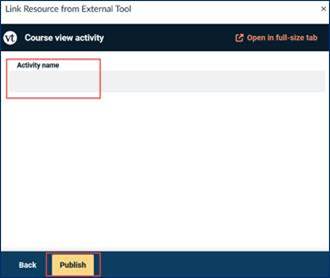
- The Course View Activity Window will open. Place your cursor in the Activity Name field, type in the assignment date, and select publish.
- After selecting Publish the window will close and return to the Configure External Tool Window. If you see a URL in the window, your assignment has been created. Click on Select to add the VoiceThread Assignment to the Assignment Page (you will not be able to see the VoiceThread Assignment yet).
Ensure you check the “Load in a New Tab” to ensure accessibility.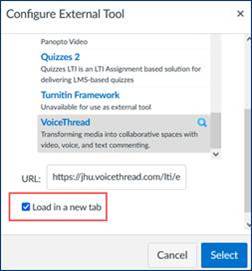
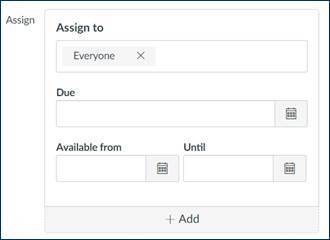
- Finish updating the Assign Box and then Save the VoiceThread Assignment.
- The final view should look like the image below (or some variation if additional instructions for the assignment are added) and will have a button to launch the assignment in a new tab.
- A Configure External Tool window will open. Move down and click on VoiceThread.
Was this article helpful?
That’s Great!
Thank you for your feedback
Sorry! We couldn't be helpful
Thank you for your feedback
Feedback sent
We appreciate your effort and will try to fix the article